
Introduction
When it comes to remote desktop solutions, there are several open-source alternatives available in the market.
After testing various options, I’ve been using RustDesk in my infrastructure for quite some time, and it has proven to be a reliable and robust solution.
While tools like Apache Guacamole, TigerVNC, and others offer similar capabilities, I chose RustDesk for its stability and straightforward setup process.
RustDesk is an open-source alternative to TeamViewer and AnyDesk that allows you to have full control of your data through a self-hosted solution.
In this article (tutorial is a big word, LOL), we’ll see how to install a RustDesk server on Hetzner Cloud with a modest cost of about €4.62 monthly, using Docker.
This guide follows the official documentation from:
- Docker installation and some shortcuts
- Docker post-installation
- RustDesk self-hosting
Creating the Server on Hetzner
Environment Preparation
If you don’t already have a Hetzner Cloud account, you must create one by visiting https://hetzner.cloud/?ref=vJLpYsXw0BK6 and completing the registration process.
By using this referral link, you’ll receive €20 in Hetzner Cloud credits to get started!
Once you click the referral link, you’ll see a congratulations page confirming that you’ve received cloud credits. Click “Continue” to proceed with the registration process.
You’ll then be redirected to the main Hetzner Cloud page, where you can learn more about their services. To complete your account creation, click the red “Sign Up” button in the top-right corner and follow the registration steps.
After completing your registration, you can access the Hetzner Cloud console at https://console.hetzner.cloud/projects to start creating your first server.
Registered users can access the Hetzner Cloud console at https://console.hetzner.cloud/projects.
Once logged in:
- Click on “+ New project”
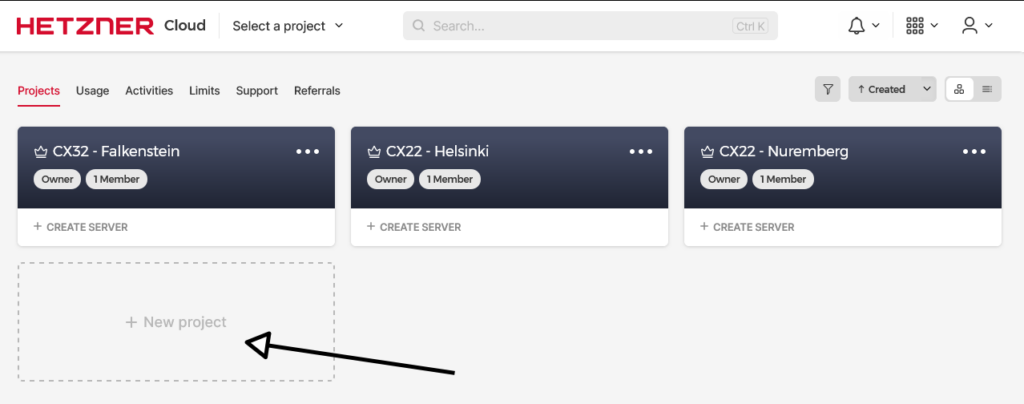
- Create a project named “RustDesk“

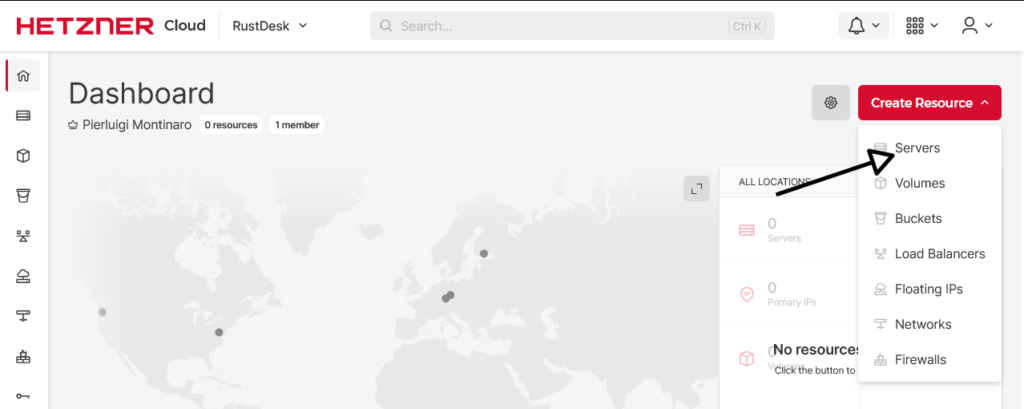
- Access the project and click the red “Create Resources” button followed by “Servers”
Server Configuration
- Location: Helsinki
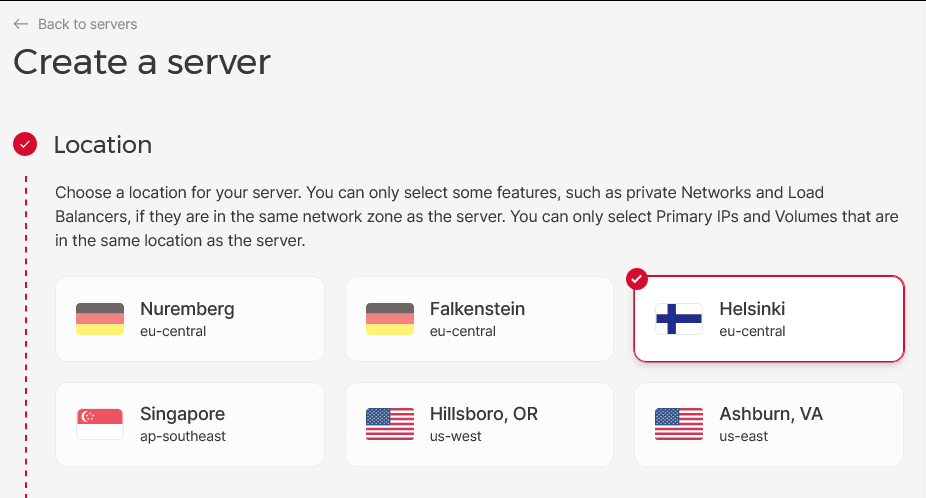
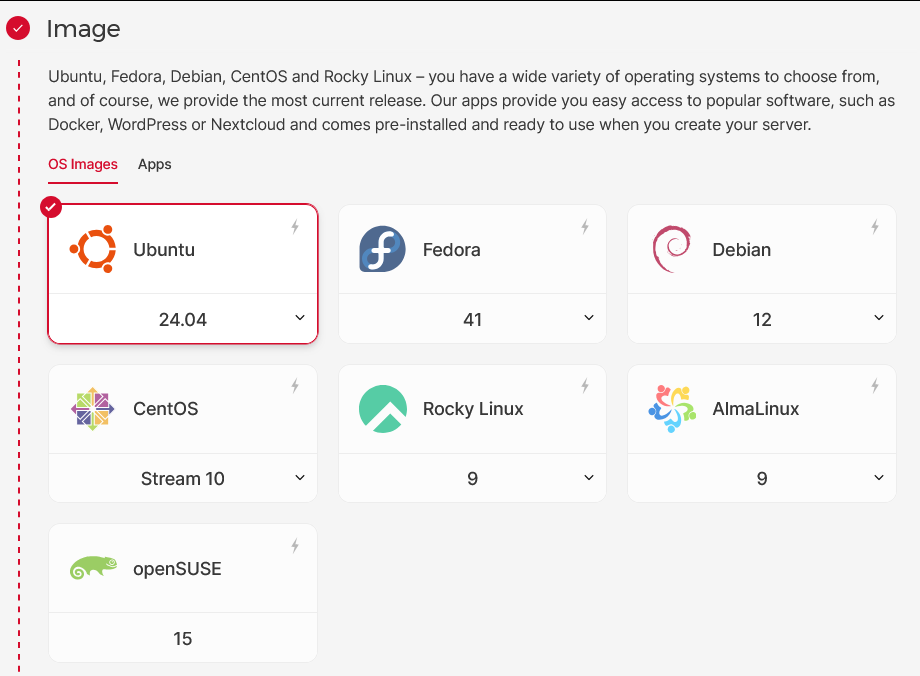
- Image: Ubuntu 24.04
- Type: Shared vCPU (Architecture: x86 Intel/AMD)
- Server: CX22 (2 vCPUs, 4GB RAM, 40GB SSD)
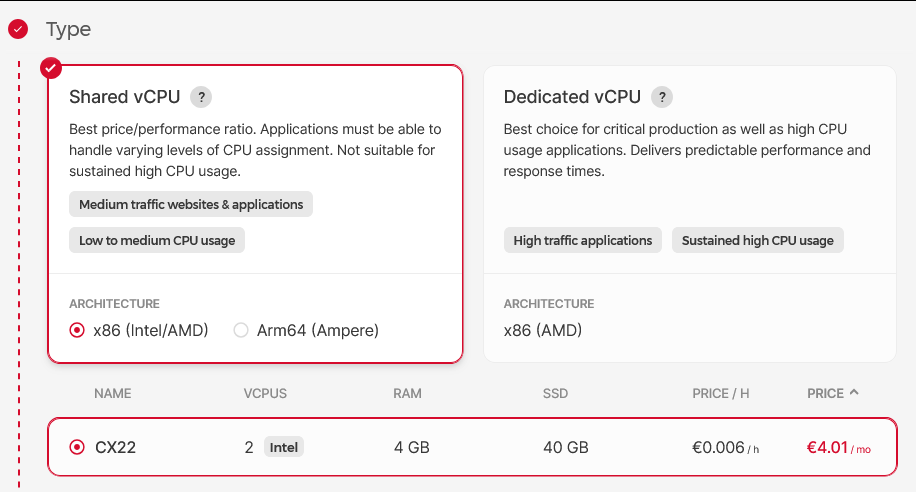
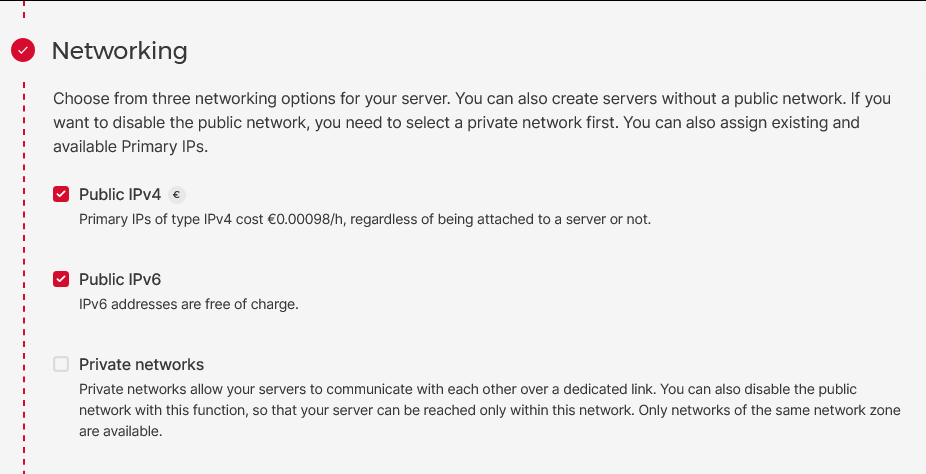
- Networking: leave default settings with public IPv4 and IPv6
- For the “SSH keys” section, we need to prepare the keys.
SSH Key Configuration
Security is paramount, so we’ll use an Ed25519 SSH key, which offers better security and efficiency compared to RSA and ECDSA.
Before proceeding on the Hetzner console, let’s generate our SSH key on our local Linux machine using the command:
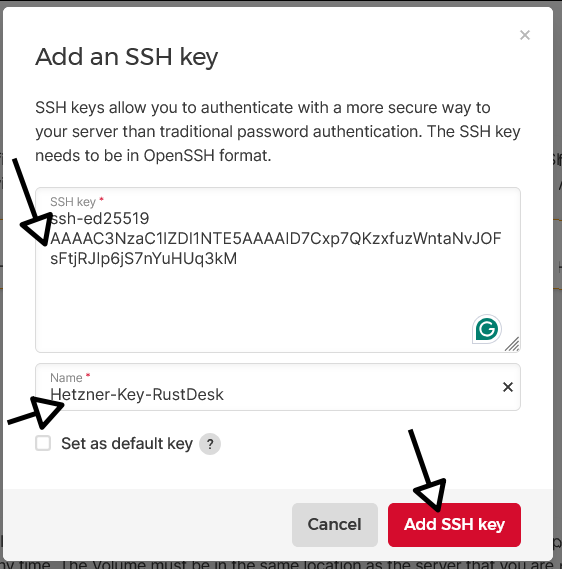
ssh-keygen -t ed25519 -f ~/.ssh/id_ed25519_hetzner_rustdeskOn the Hetzner console, in the “SSH Keys” section:
- Click on “+Add SSH key”

- Paste the contents of ~/.ssh/id_ed25519_hetzner_rustdesk.pub (the public key)
- Give your key a name (e.g., “Hetzner-Key-RustDesk“)
- Click on “Add SSH key”
Completing VM Configuration
For the remaining sections:
- Skip “Volumes”, “Firewalls”, “Backups”, “Placement groups”, “Labels”, and “Cloud config”
- Name the VM “rustdesk“
- Click the “Create & Buy now” button at the bottom right to create the VM
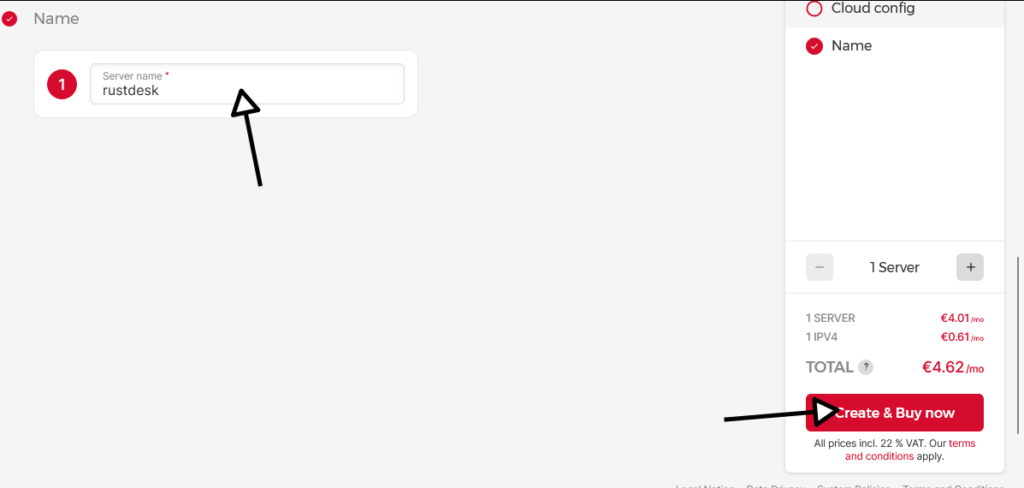
- Obtain your IP address after a few minutes
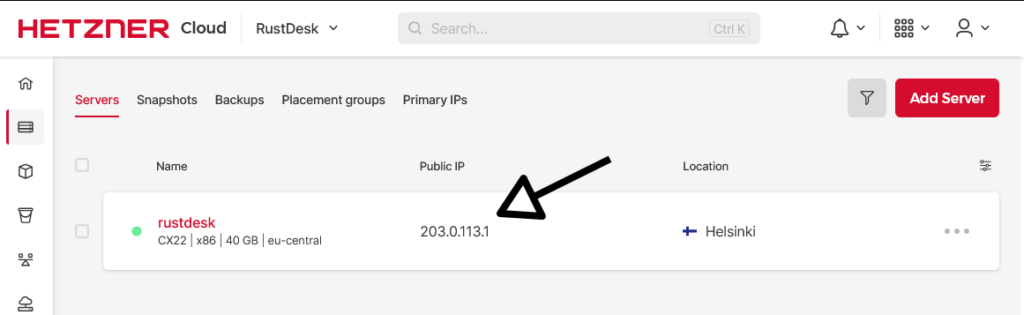
In my case, I got the IP address 203.0.113.1
Connecting to Your VM
Initial Root Connection
First, connect to your newly created VM as root:
ssh -i ~/.ssh/id_ed25519_hetzner_rustdesk root@203.0.113.1Creating a Non-Root User
For security best practices, it is recommended that a dedicated non-root user run Docker instances instead of using the root account. This enhances security by limiting privileges and reducing potential attack vectors.
Some cloud providers, such as Vultr, automatically create a non-root user (e.g., ubuntu, debian, or ec2-user). If your provider has already created a non-root user, you can use that user instead of creating a new one.
However, on Hetzner Cloud, there is no default non-root user, so we need to create one manually. This guide will create a user named rustdesk and configure passwordless sudo access.
# Create the rustdesk user
adduser --disabled-password --gecos "" rustdesk

# Add rustdesk user to sudo group
usermod -aG sudo rustdesk

# Set up SSH key authentication
mkdir -p /home/rustdesk/.ssh
cp /root/.ssh/authorized_keys /home/rustdesk/.ssh/authorized_keys
chown -R rustdesk:rustdesk /home/rustdesk/.ssh
chmod 700 /home/rustdesk/.ssh
chmod 600 /home/rustdesk/.ssh/authorized_keys

# Configure passwordless sudo for rustdesk user
echo "rustdesk ALL=(ALL) NOPASSWD:ALL" > /etc/sudoers.d/rustdesk
chmod 440 /etc/sudoers.d/rustdesk
Switching to rustdesk User
Logout from the root session and reconnect as rustdesk user:
ssh -i ~/.ssh/id_ed25519_hetzner_rustdesk rustdesk@203.0.113.1System Preparation
Now that we’re connected as the rustdesk user, let’s proceed with Docker installation in the fastest way I know.
Docker Installation
Execute the following command to install Docker:
bash <(wget -qO- https://get.docker.com)User Configuration
To avoid using sudo for every Docker command, add your user to the docker group:
sudo usermod -aG docker $USERInstallation Verification
Log out and log back in to apply the group changes, then verify the installation with:
docker run hello-world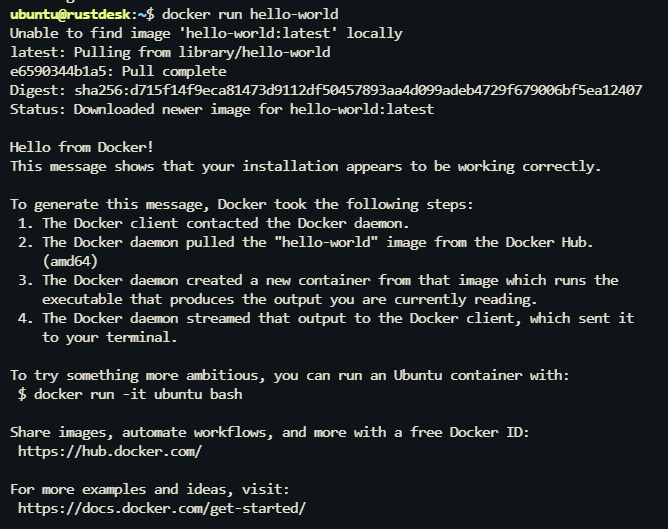
RustDesk Configuration
Preparing the Environment
First, create a dedicated directory for our RustDesk setup:
mkdir rustdesk
cd rustdesk
Creating docker-compose.yml
Create and edit the Docker Compose configuration file:
nano docker-compose.ymlAdd the following content:
services:
  hbbs:
    container_name: hbbs
    image: rustdesk/rustdesk-server:latest
    command: hbbs
    volumes:
      - ./data:/root
    network_mode: "host"
    depends_on:
      - hbbr
    restart: always

  hbbr:
    container_name: hbbr
    image: rustdesk/rustdesk-server:latest
    command: hbbr
    volumes:
      - ./data:/root
    network_mode: "host"
    restart: always
Firewall
Understanding Network Mode and Firewall
In our docker-compose.yml, we’re using network_mode: “host”, which means the containers will use the host’s network stack directly instead of Docker’s virtual networking.
This configuration provides better network performance, allows direct access to host network interfaces and bypasses Docker’s network virtualization.
However, even with host network mode, we still need to configure the host’s firewall (UFW) to allow incoming connections.
The firewall operates at the host level, regardless of how Docker is configured.
Firewall Configuration
Install and configure UFW (Uncomplicated Firewall):
sudo apt install ufw

# Allow SSH first to prevent being locked out
sudo ufw allow ssh

# Allow RustDesk required ports
sudo ufw allow 21115/tcp
sudo ufw allow 21116/tcp
sudo ufw allow 21116/udp
sudo ufw allow 21117/tcp
sudo ufw allow 21118/tcp
sudo ufw allow 21119/tcp

# Enable the firewall
sudo ufw enable

# Verify the configuration
sudo ufw status
These ports are used for:
- 22 TCP: SSH access
- 21115 TCP: NAT type test
- 21116 TCP: TCP hole punching
- 21116 UDP: heartbeat/ID server
- 21117 TCP: relay
- 21118 TCP: support for web clients on Server
- 21119 TCP: support for web clients on Relay Server
Starting RustDesk Services
Launch the Containers
From the rustdesk directory where we created the docker-compose.yml file, start the services and view the logs:
docker compose up -d && docker compose logs -fThe -d flag runs the containers in detached mode (background), while logs -f allows us to monitor the logs in real-time.
Post-Launch Verification
After launching the services, Docker will create a data directory in your current folder. Inside this directory, you’ll find several files, but the most important one for client configuration is id_ed_25519.pub.
To view and save the public key:
# Display the content of the public key
cat data/id_ed25519.pub

# Save it to a separate file for backup
cat data/id_ed25519.pub > ~/rustdesk_public_key.txtImportant: This public key is crucial for secure client connections to your RustDesk server. Save it in a secure location as you’ll need to configure it in every client that will connect to your server.
Client Configuration
Download RustDesk Client
Visit https://rustdesk.com/download to see all available options and download the right client for your operating system.
Configure Client Settings
Once RustDesk is installed on your device:
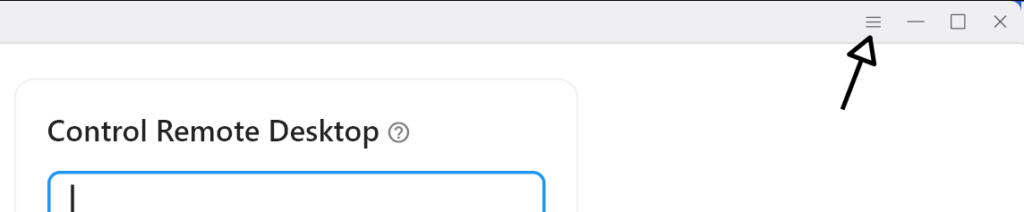
- Open RustDesk
- Click on “Settings” in the top right of the screen
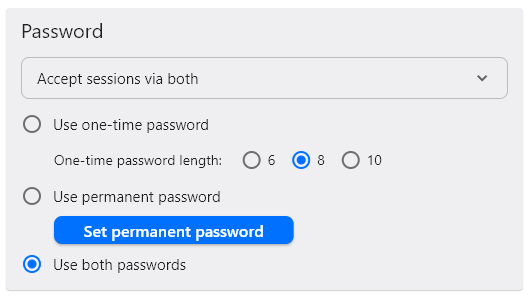
In the “Security” section:
- Click “Unlock security settings”

- Under “Password”, use “Set Permanent Password” if you need unattended access
- Set the one-time password length to 8 characters
At the bottom, look for the “Security” block:
- Check “Enable direct IP access”
- Set the port to 21118 (default)

In the “Network” section:
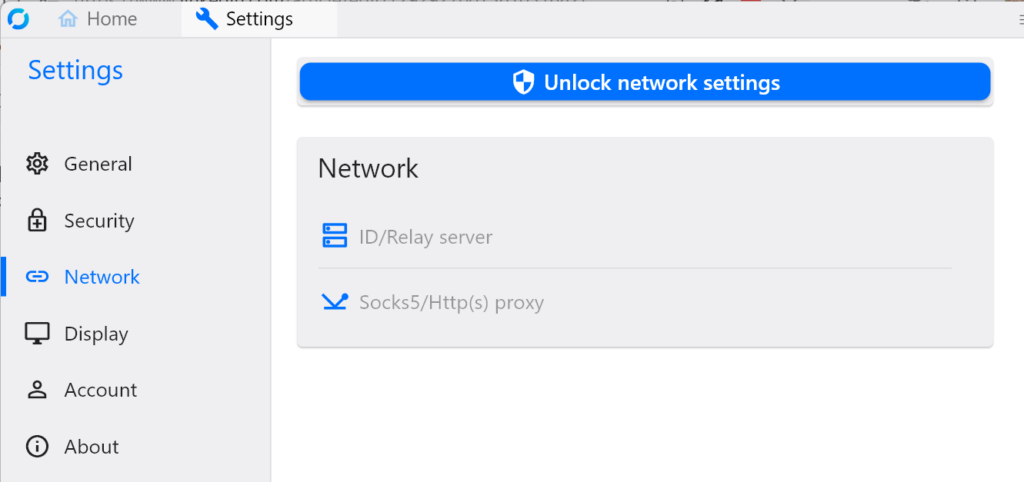
- Click “Unlock network settings”
- Click on “ID/Relay Server”
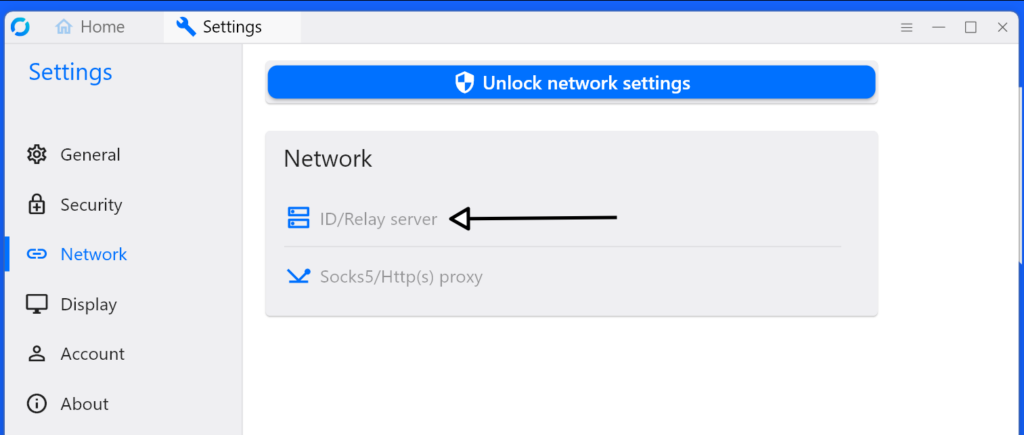
- Set the ID server address to: 203.0.113.1
- Set the Relay server address to: 203.0.113.1
- In the “Key” field, paste the content of data/id_ed25519.pub

Apply the changes, then navigate to the Home tab
At the bottom of the window, you should see the “Ready” message:
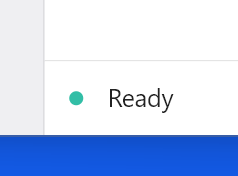
This indicates that your client is successfully connected to your self-hosted RustDesk server and ready to use.
Time to enjoy your self-hosted remote desktop solution! 🖥️
Acknowledgments
Special thanks to the Hetzner team for their valuable feedback in improving this article, particularly regarding security practices and technical optimizations.
Thanks also to the RustDesk open source community for creating this excellent remote desktop control alternative.
PS: Just for fun
Connecting from Android to PC:
Connecting from PC to Android:
Leave a Reply